React
React - CRA 없이 React 환경 설정
🔎 npm init
우선 프로젝트를 진행할 폴더를 생성한 후 터미널에서 npm init 명령어를 통해 package.json 을 생성한다.
npm init -y// package.json
{
"name": "demo-project",
"version": "1.0.0",
"description": "",
"main": "index.js",
"scripts": {
"test": "echo \"Error: no test specified\" && exit 1"
},
"keywords": [],
"author": "",
"license": "ISC",
// 따로 추가한 부분
"type": "module" // module 사용하는 방식 "module" > ES Module / "commonjs" > commonJS
}
최초로 생성된 package.json은 위와 같이 설정된다. 이 부분은 추후에 환경설정을 진행하며 설정이 추가된다.
package.json에 대한 설정 내용은 아래 링크에서 확인할 수 있다.
공식문서
package.json | npm Docs
Specifics of npm's package.json handling
docs.npmjs.com
정리글
Node.js - package.json 설정하기(setting)
Node.js package.json 설정하기 🔎 package.json 란 package.json 란 npm(또는 yarn, pnpm) 으로 관리되는 node.js 기반의 프로젝으에 대한 상세 이자 해당 프로젝트에서 관리하는 module 의 의존성에 대한 상세를 모
kimby.tistory.com
🔎 React + TypeScript 설치
이제 npm 을 사용해서 React 와 TypeScript 관련 모듈을 설치한다.
npm install react react-dom

npm install -D typescript @types/react @types/react-dom// tsconfig.json
{
"compilerOptions": {
"target": "esnext",
"module": "esnext",
"moduleResolution": "node",
"lib": ["dom", "dom.iterable", "esnext"],
"experimentalDecorators": false,
"emitDecoratorMetadata": false,
"jsx": "react",
"resolveJsonModule": true,
"esModuleInterop": true,
"forceConsistentCasingInFileNames": true,
"allowJs": false,
"checkJs": false,
"sourceMap": false,
"declaration": true,
"strict": true,
"noImplicitAny": true,
"suppressImplicitAnyIndexErrors": false,
"strictNullChecks": true,
"strictFunctionTypes": false,
"skipLibCheck": false,
"baseUrl": "./",
"outDir": "./dist"
},
"include": ["src"],
"exclude": ["node_modules"],
}TypeScript 관련 설정을 관리하는 tsconfig.json 이다. 직접 만들어서 내용을 채워도 되고 'npm tsc --init' 을 사용하여 자동으로 생성할 수도 있다. 이렇게 설치하게 되면 모든 설정값들이 tsconfig.json에 포함되어 생성된다. 설정값에 대한 자세한 내용은 아래 링크에서 확인할 수 있다.
공식문서 (번역)
TypeScript 한글 문서
TypeScript 한글 번역 문서입니다
typescript-kr.github.io
정리글
TypeScript - tsconfig.json 설정하기 (setting)
TypeScript tsconfig.json 설정하기 🔎 tsconfig.json 란 tsconfig.json 란 타입스크립트(ts) 파일을 자바스크립트(js) 파일로 변환하는 컴파일 설정 정의해놓은 파일이다. tsc --init 해당 명령어를 통해 tsconfig.json
kimby.tistory.com
React 와 TypeScript 관련 모듈을 install 하면 package.json 에 dependencies, devDependencies 가 추가되는데 둘은 모두 설치된 module 의 종속성을 관리하는 설정이고 차이가 있다면 devDependencies 는 개발환경에서만 사용되는 module 을 관리하는 설정값이다.
{
  ...,
  "dependencies": {
    "react": "^18.2.0",
    "react-dom": "^18.2.0"
  },
  "devDependencies": {
    "@types/react": "^18.2.33",
    "@types/react-dom": "^18.2.14",
    "typescript": "^5.2.2"
  }
}
🔎 Babel 설치
Babel 이란 다양한 버전과 종류의 브라우저에서 새로운 문법이나 타입스크립트, JSX 같이 다른 언어로 분류되는 언어들에 대해서도 동작할 수 있도록 호환성을 지켜주는 자바스크립트 컴파일러다. React, TypeScript를 사용하는데 있어서 필수적인 Babel을 사용하기 위해 아래 모듈을 설치한다.
npm install -D @babel/core @babel/cli babel-loader
npm install -D @babel/preset-env @babel/preset-react @babel/preset-typescript// babel.config.json
{
"presets": [
["@babel/preset-react", { "runtime": "automatic" }],
"@babel/preset-typescript",
"@babel/preset-env"
]
}npm과 TypeScript와 마찬가지로 babel 도 설정을 관리하는 config.json 파일이 존재한다. 우선은 위 내용만 포함하며 직접 생성하면 되고 자세한 내용이 궁금하면 아래 링크를 확인해보자.
Configure Babel · Babel
Babel can be configured! Many other tools have similar configs: ESLint (.eslintrc), Prettier (.prettierrc).
babeljs.io
🔎 Webpack5 설치
마지막으로 Webpack 을 설치한다. Webpack 이란 모듈번들러로 설치된 각 모듈들의 의존성을 관리하고 브라우저가 인식할 수 있는 자바스크립트 코드로 변환해주는 역할을 한다. (https://kimby.tistory.com/69)
npm install -D webpack webpack-cli webpack-dev-server html-webpack-plugin clean-webpack-pluginimport path from 'path'
import HtmlWebpackPlugin from 'html-webpack-plugin'
import { CleanWebpackPlugin } from 'clean-webpack-plugin'
const __dirname = path.resolve()
export default function config(_, argv) {
return {
devtool: argv.mode ? 'source-map' : 'cheap-module-source-map',
mode: argv.mode,
entry: path.join(__dirname, 'src/index.tsx'),
devServer: {
historyApiFallback: true,
port: 3000,
hot: true,
},
module: {
rules: [
{
test: /\.(ts|tsx|js|jsx)$/,
use: 'babel-loader',
exclude: /node_modules/,
},
],
},
output: {
publicPath: '/',
path: path.resolve(__dirname, 'dist'),
},
resolve: {
modules: [path.resolve(__dirname, 'src'), 'node_modules'],
extensions: ['.ts', '.tsx', '.js', '.json'],
},
plugins: [
new HtmlWebpackPlugin({
template: './public/index.html',
}),
new CleanWebpackPlugin(),
],
}
}webpack 관련 설정파일을 관리할 수 있는 webpack.config.js 파일이다. 자세한 설명은 아래 링크에서 확인할 수 있다.
Configuration | 웹팩
웹팩은 모듈 번들러입니다. 주요 목적은 브라우저에서 사용할 수 있도록 JavaScript 파일을 번들로 묶는 것이지만, 리소스나 애셋을 변환하고 번들링 또는 패키징할 수도 있습니다.
webpack.kr
🔎 기본 프로젝트 구성
├── public
│   └── index.html
├── src
│   └── index.tsx
├── babel.config.json
├── package.json
├── tsconfig.json
└── webpack.config.js마지막으로 프로젝트 구성은 위와 같은 구조로 구성된다. 현재까지 babel.config.json , package.json, tsconfig.json, webpack.config.js 파일은 생성되었고 나머지 2개 파일을 생성해보자.
<!-- public/index.html -->
<!DOCTYPE html>
<html lang="en">
<head>
    <meta charset="UTF-8">
    <meta http-equiv="X-UA-Compatible" content="IE=edge">
    <meta name="viewport" content="width=device-width, initial-scale=1.0">
    <title>Demo Project</title>
</head>
<body>
    <div id="root"></div>
</body>
</html>// src/index.tsx
import { createRoot } from 'react-dom/client'
const container = document.getElementById('root')
const root = createRoot(container as Element)
root.render(<div>Hello World</div>)
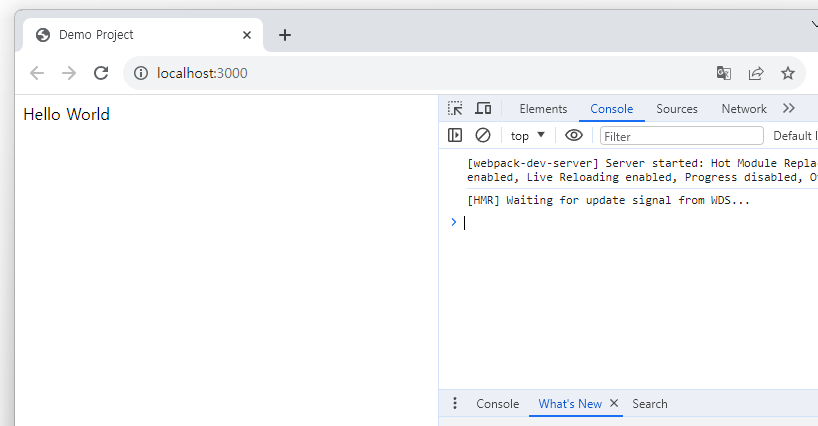
생성할 파일은 모두 완료되었고 마지막으로 개발환경을 띄우기 위해 package.json 에 script 부분을 수정하고 npm 명령어를 통해 첫화면을 띄우면 CRA 없이 React 구성이 완료된다.
{
  ...,
  "scripts": {
    "dev": "webpack-dev-server --mode development --open --hot",
    "build": "webpack --mode production",
  },
}npm run dev
🔎 결과화면